To run Linux operating system on Windows operating system we should use Virtual Box.
Virtual Box is free software from Oracle. It enables you to install any operating systems in the virtual machines. Virtual Box runs on Windows, Linux, Mac operating systems and supports many guest operating systems.
Step 1 : Download Virtual Box
Step 2 : Install Virtual Box
Click on the download exe file and follow the instructions.


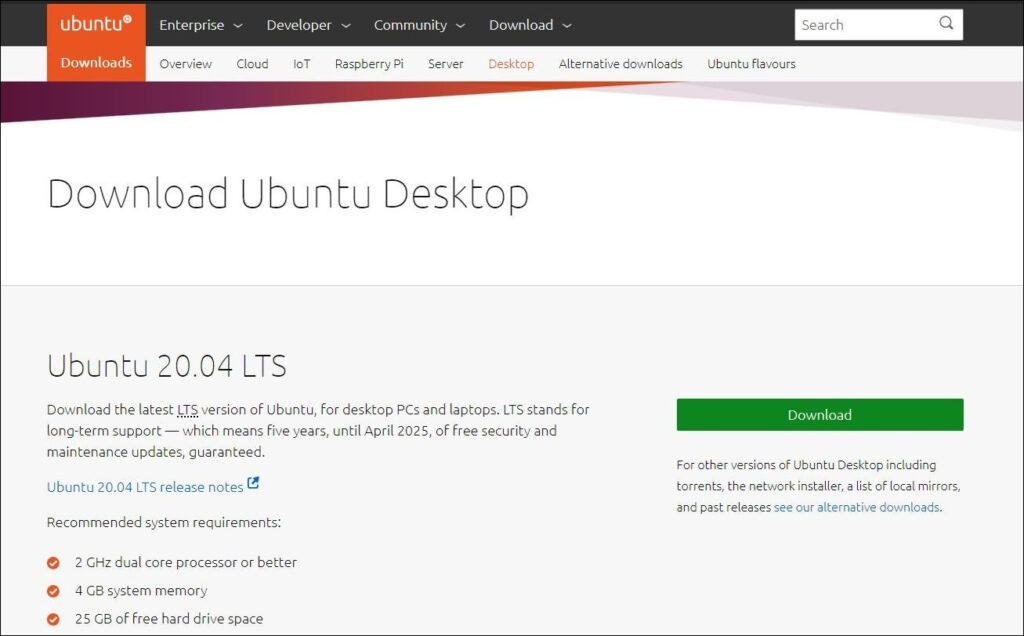
Step 3 : Download Ubuntu ISO File
Ubuntu latest ISO file or the available newest version.
Example : Ubuntu 20.04 LTS
LTS – Stands for Long Time Support
Click on the Ubuntu button, will redirect you to the official Ubuntu website. Here you can view the download button option to download the Ubuntu ISO file.
Step 4 : Install Ubuntu
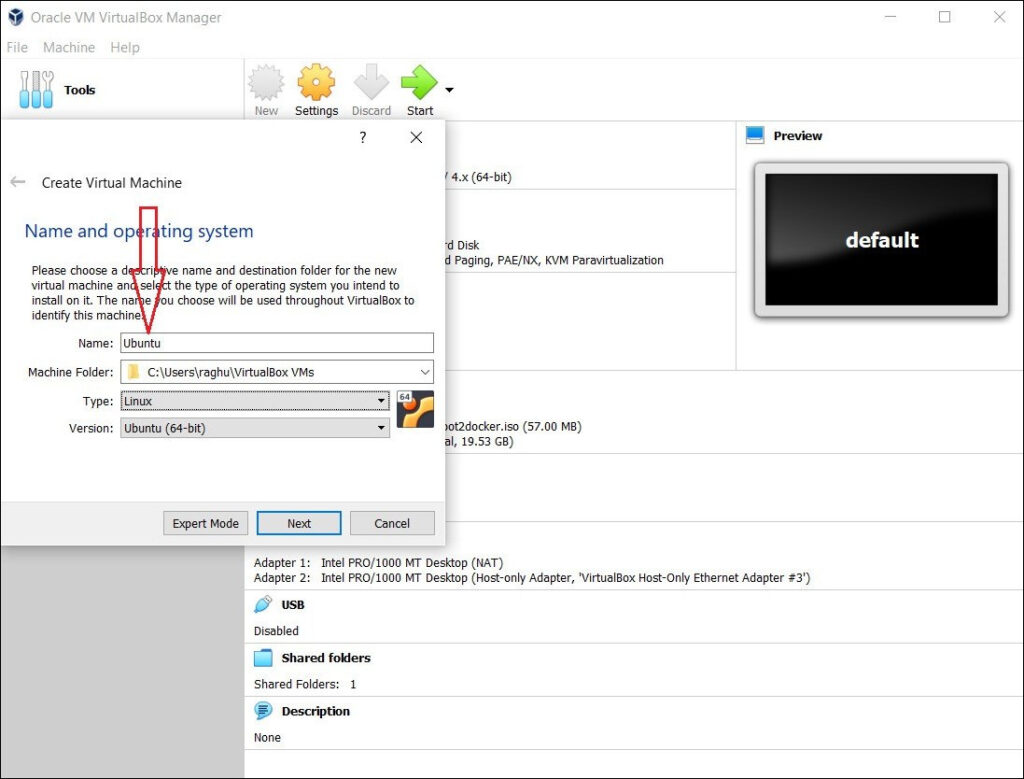
Launch the Virtual Box and Click on New button.

Enter a proper name for operating System. In our case we are entering name as Ubuntu and click on Next button.
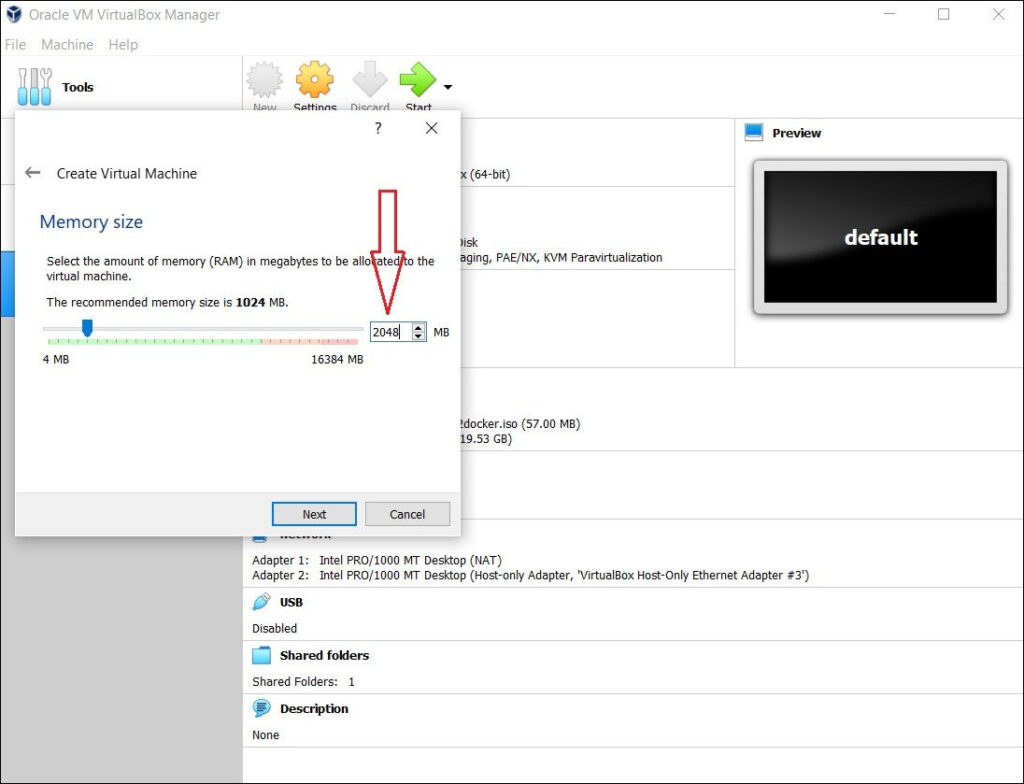
Virtual machine allocates 1024 MB memory as recommended. We can change it up to 2048 MB and more if necessary.
It depends on your main machine RAM size. 2 GB RAM is sufficient for running Ubuntu smoothly.
After allocating memory, Click on Next button.
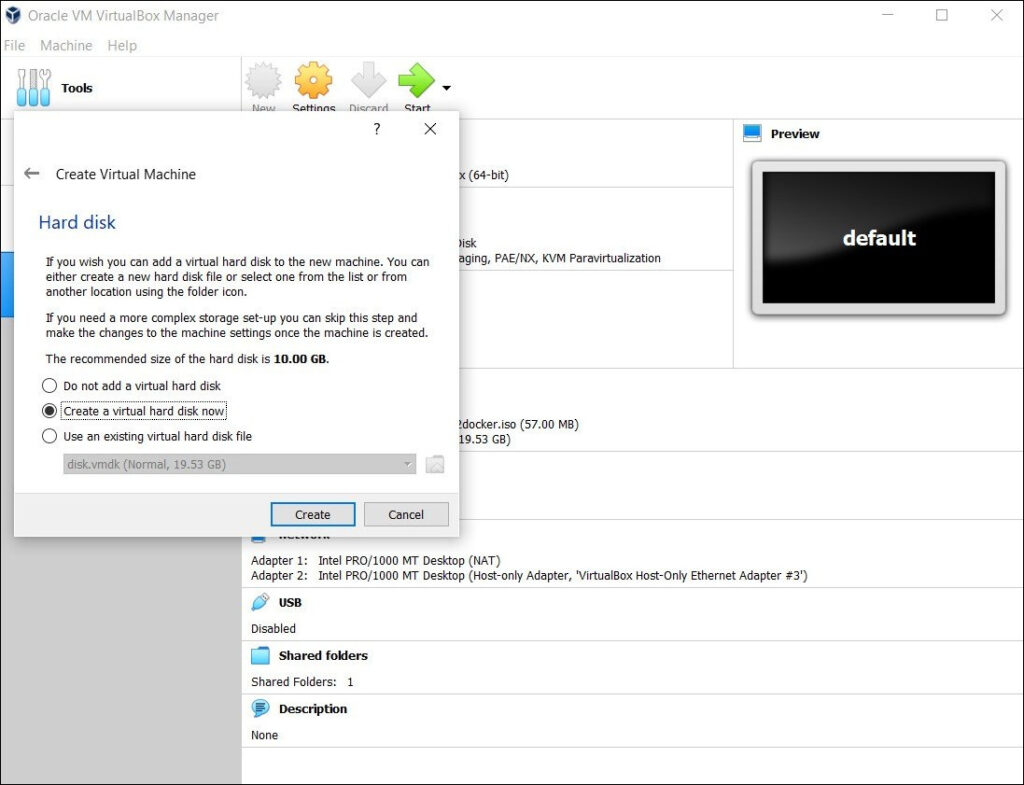
Recommended size for the virtual hard disk is 10.00 GB. Make sure your working directory C drive has sufficient space. As Virtual box installation is by default in C Drive – Space of C Drive is being used.
This allocated space is hard disk for Linux. Click on Create button.
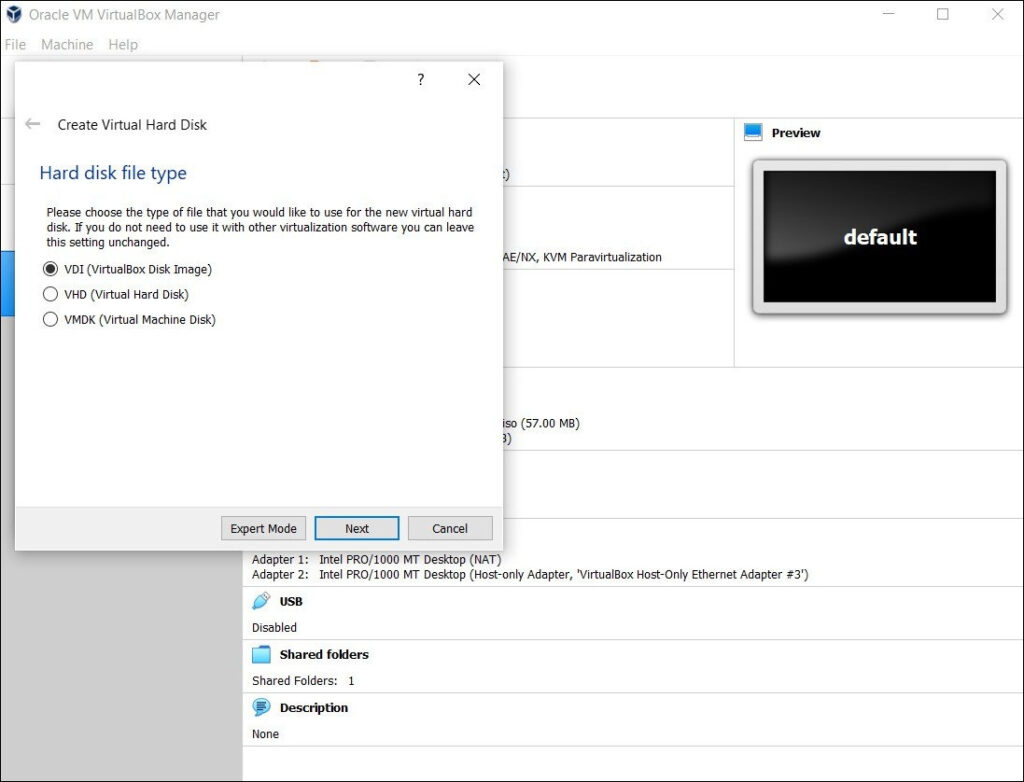
We have to select the Hard disk file type. Recommended type is VDI ( VirtualBox Disk Image )
Check the checkbox and click on Next button.
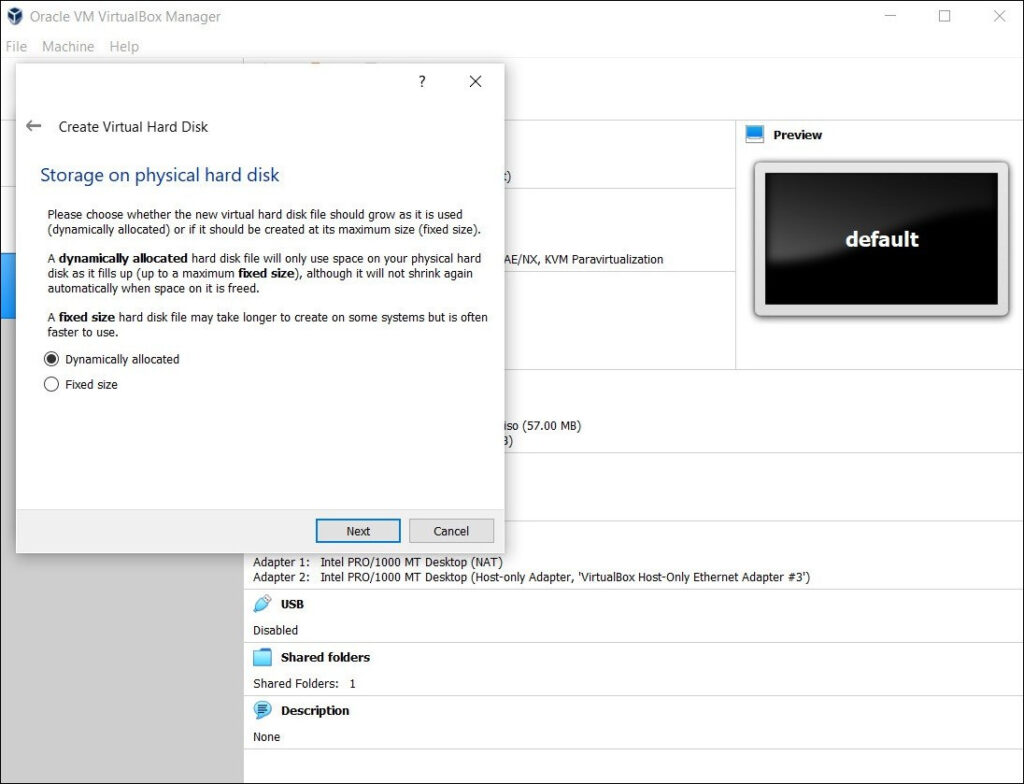
Here we can select the storage type – which is Dynamically allocated Or Fixed size. Use Dynamically Allocated option which is often recommended. Click on Next button.
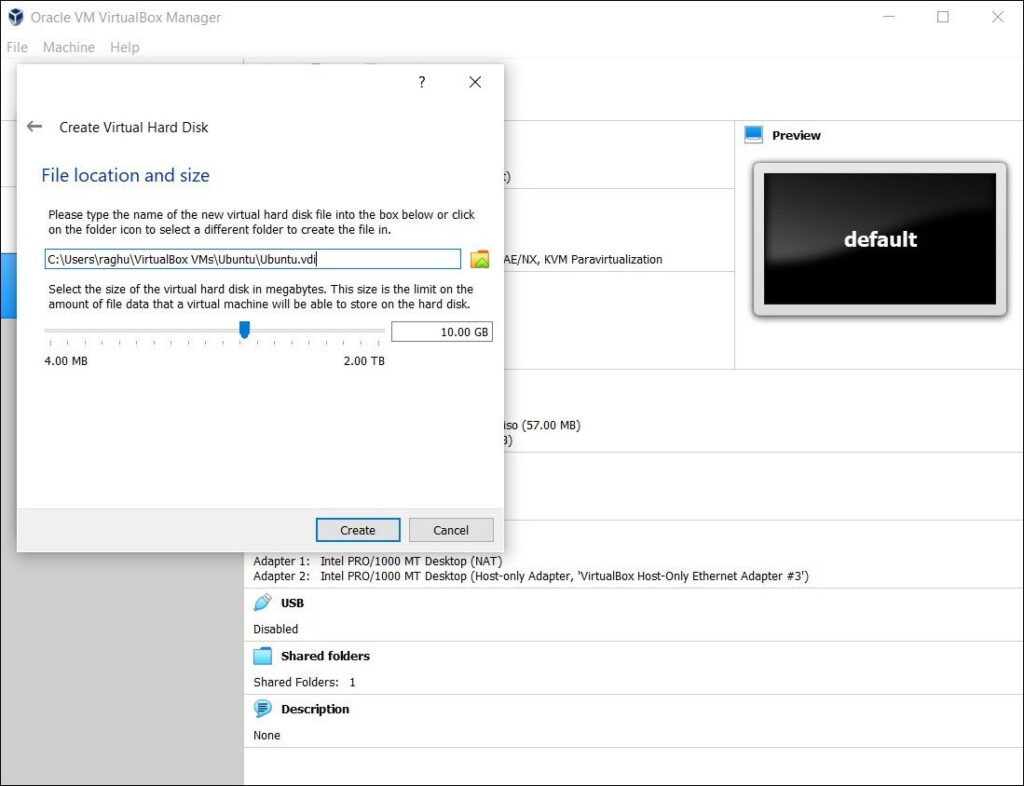
Type a name for the Virtual Hard disk or leave as it is. You can also increase here the hard disk size.
If you are going to use Ubuntu for basic purpose then 10 GB memory is sufficient, but if you are going to perform work advance then increase the hard disk size to 20 or 25 GB.
Click on Create button.
It will create the Ubuntu virtual machine.
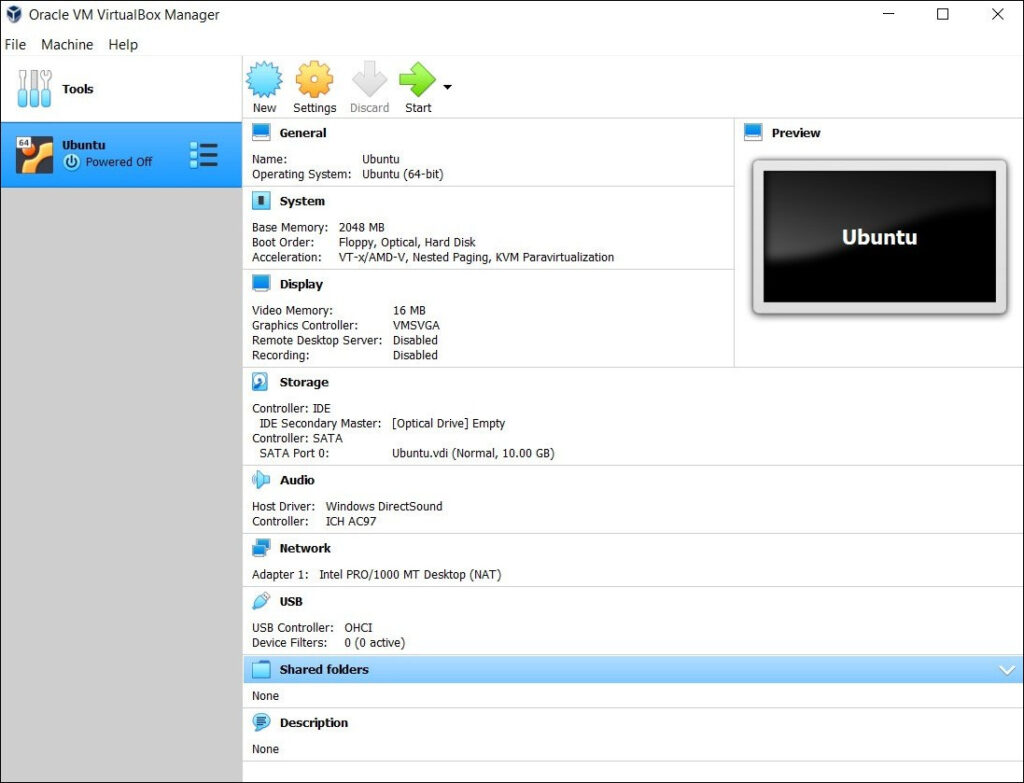
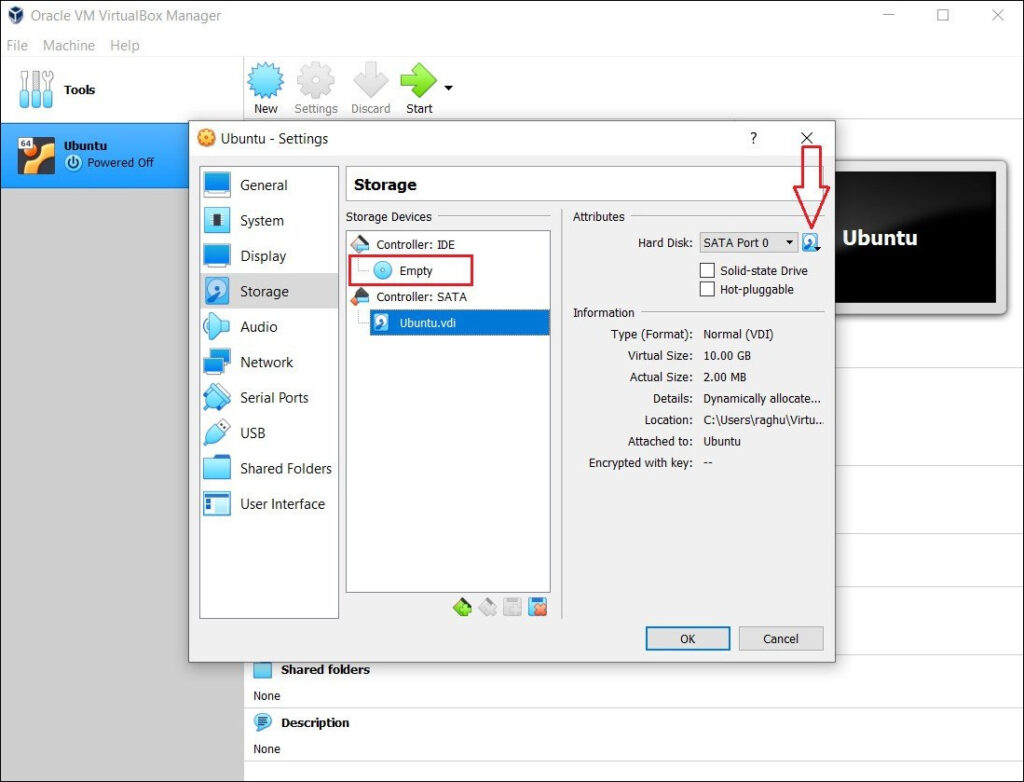
Right click on Ubuntu and Click settings option. Go to storage and verify the Ubuntu ISO file location.
If ISO file location is wrong or not found then click on Empty icon and browse the proper ISO file path.
Click on OK button.
We can browse various options like General, System, Display, Storage, Audio, Network, Serial Ports, USB, Shared Folders, User Interface.
Click on Start button to boot the Ubuntu.

Ubuntu will boot.

Click on “Install Ubuntu”

Select the desired language.

Normal installation will begin. If you want to install the third party software select the option and click on Continue button.

Select the option “Erase disk and install Ubuntu”. This is done for clean installation.

Click on Continue button.

Select the Time Zone. In our case we are selecting “Kolkata”.

Set proper Username / Password. Click on Continue button.

Ubuntu will start to install and along with installation third party soft wares will too get installed.

Click on Restart Now as the installation gets complete.

After login Ubuntu dashboard will appear.

Hope this information was helpful to you.
Feel free to comment if you face any issues or have any doubts.