Docker is a devops container management tool which is used to create, deploy and run applications using containers.
It’s a client server architecture which helps building, distributing and running containers.
Container is a composite package containing libraries and need full dependencies.
We can install Docker Toolbox and Docker Desktop on Windows operating system. Docker Desktop does not support old Windows version.
Docker Toolbox is an alternate for Docker Desktop for the old Windows version. Docker Desktop supports on Windows 10 Home 64-bit version or Windows 10 Pro or Enterprise or Education version.
Note :
To install Docker Tool box please check that your system supports BIOS Virtualization and your windows version is Windows 7 and above.
Docker Toolbox contains following important tools:
- Docker CLI Client : It’s main function is to run the Docker Engine for creating images and containers.
- Docker Machine : It’s main function is to run Docker Engine commands ( Windows terminal )
- Docker Compose : It’s main function is to run docker-compose commands.
- Kinematic : It’s main function is to automate docker installation and provide GUI for running containers.
- Docker Quick start Terminal App : It’s Docker command-line environment.
- Oracle VirtualBox : To create Linux local machine.
How to find out Virtualization is enabled / disabled on your system ?
A simple way to find out :
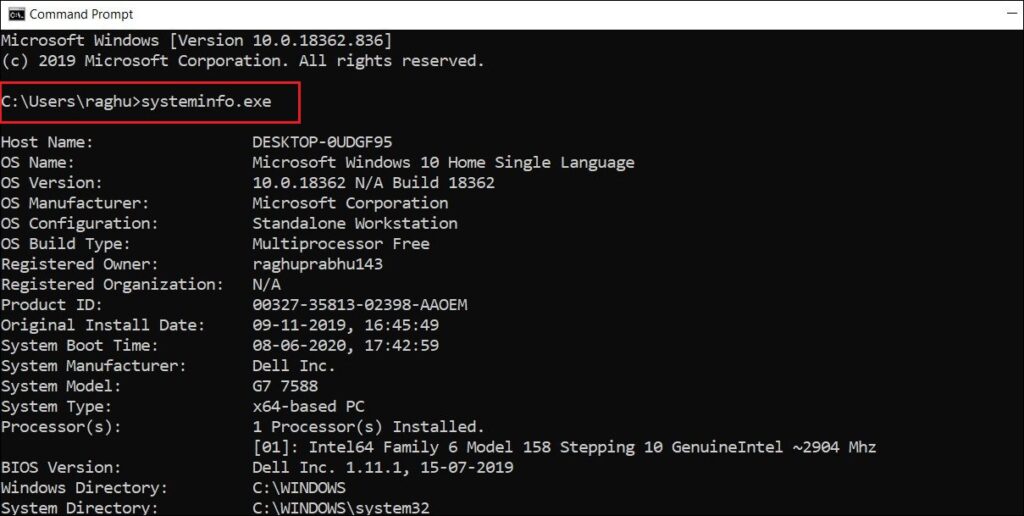
- Open Command prompt.
- Type command : systeminfo.exe
You will get an window displaying all the information of the system.
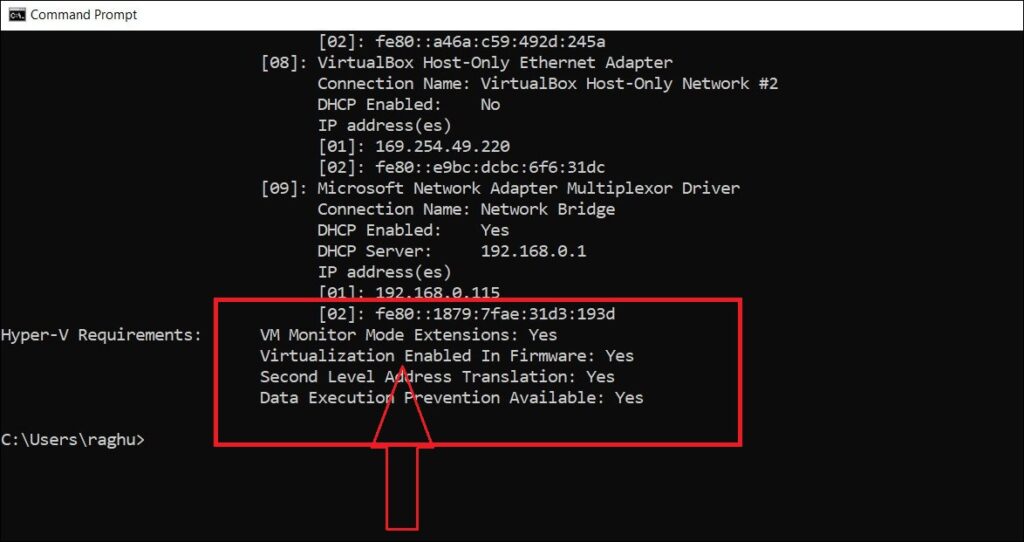
3. Here we will get the information of Hyper-V Requirements
In this case you can see that Virtualization is Enabled. But in your case if it is disabled then enable it.
Check Blog – How To Enable Virtualization Intel VT / AMD-V ( Windows 10
Install Docker Toolbox :
Download the latest docker version. Click on the below button to download and download .exe file.
Current Version is : v19.03.1

Installation Steps :
Step 1 : Double click on the downloaded installer exe file.
Step 2 : Click on the Next button to install Docker Toolbox version 19.03.01

Step 3 : By default C drive will selected for the installation – but if needed click on browse button to change the installation path.

Step 4 : Following components will be installed with the installation.
- Docker Client for Windows
- Docker Machine for Windows
- Docker Compose for Windows
- VirtualBox
- Kitematic for Windows (Alpha)
- Git for Windows

Step 5 : Select the Additional tasks check box and click on Next button to complete the installation.

Step 6 : Once Setup is almost ready for the installation. All required components are checked then Click on Install button to process further the installation process.

Step 7 : Installation process with take couple of seconds to a minute. If windows asks for any permission click allow or yes button to complete the installation.

Step 8 : Once installation of all components is completed click on the finish button. Windows will pop up a file explorer displaying the shortcuts.

Step 9 : Under the docker folder you will get two shortcuts.
- Docker Quickstart Terminal
- Kitematic (Alpha)

Step 10 : Click on the Docker Quickstart Terminal shortcut.
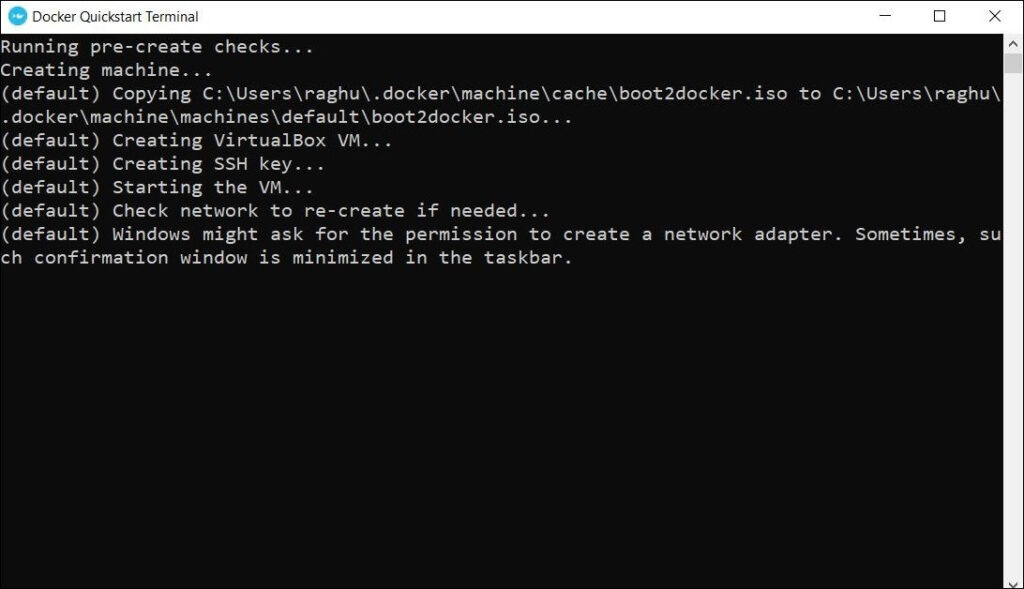
Step 11 : docker will get configured and will start docker machine with IP – 192.168.99.100

Step 12 : Check the docker version with following command : docker-machine version

Step 13 : Check the docker compose version with following command : docker-compose version
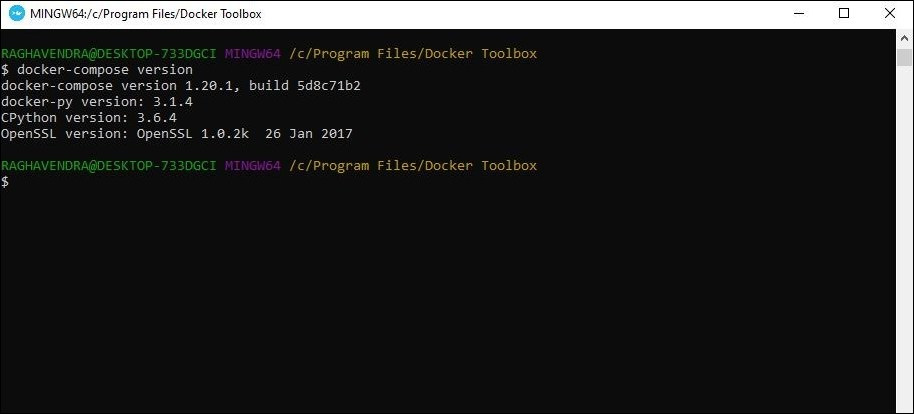
Step 14 : Run Docker “Hello World”
Type command : docker run hello-world
Note : Make sure you are connected to internet – as it will pull the hello-world image from docker-hub.
Docker Hub – Docker hub is a repository service which helps us to find and share the docker images.
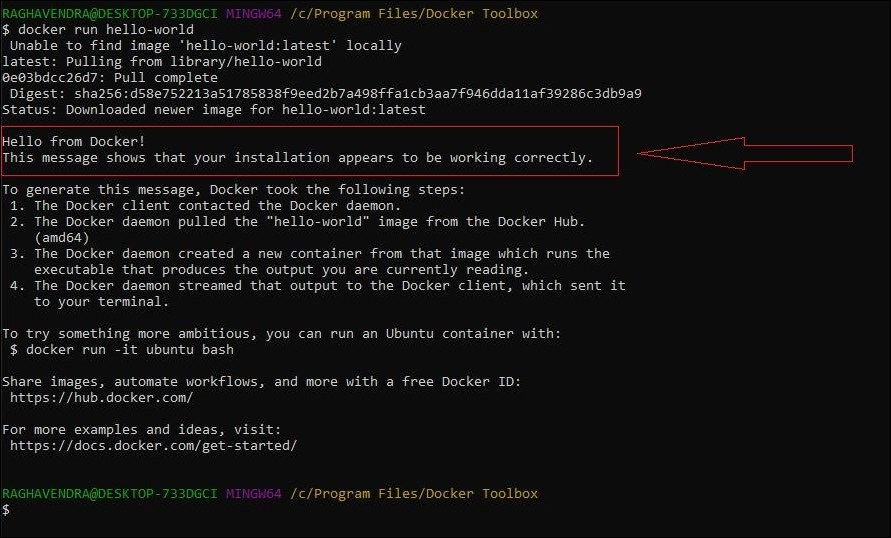
If all these steps work properly and hello world image runs properly then it means docker installation is properly working on your windows operating system.
Check Similar Blogs :
Important docker commands
Download / Install Docker Toolbox ( macOS )
Download / Install Docker Desktop ( macOS)
Download / Install Docker ( Ubuntu )
Download / Install Docker ( CentOS )
Hope this information was helpful to you.
Feel free to comment if you face any issues or have any doubts.