What’s Virtualization ?
Virtualization is a process or feature with which virtual machines can be created on Windows 10 operating system. Using Virtualization we can create and run multiple operating system.
Hyper-V or Hypervisor handles all these created virtual machines. Most of the time this feature
is disabled in the BIOS.
For Windows 10 – this feature is only available for Windows 10 Pro and Windows Enterprise ( 64 bit ).
Why Enabling Virtualization is necessary ?
Enabling Virtualization we can create and run multiple operating system.
How to find out Virtualization is enabled / disabled on your system ?
A simple way to find out :
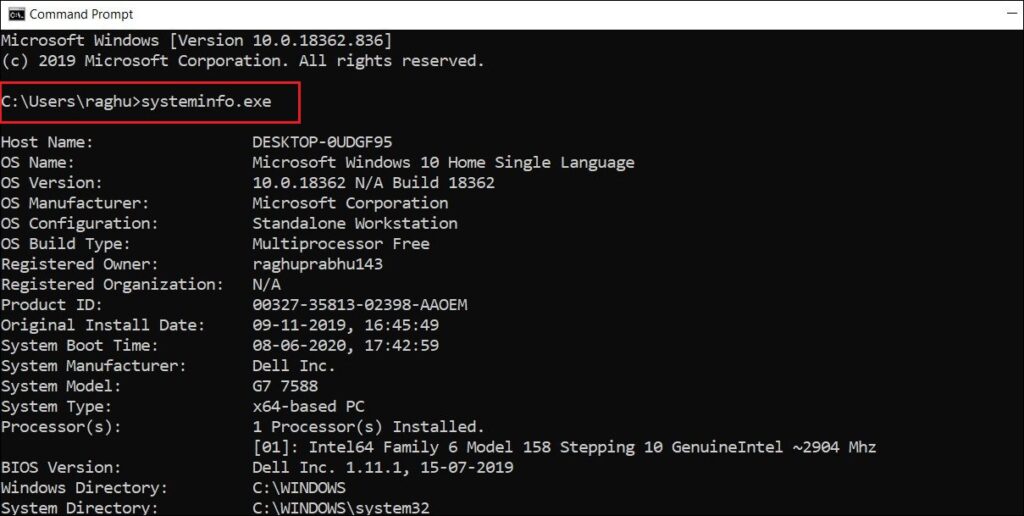
- Open Command prompt.
- Type command : systeminfo.exe
You will get an window displaying all the information of the system.

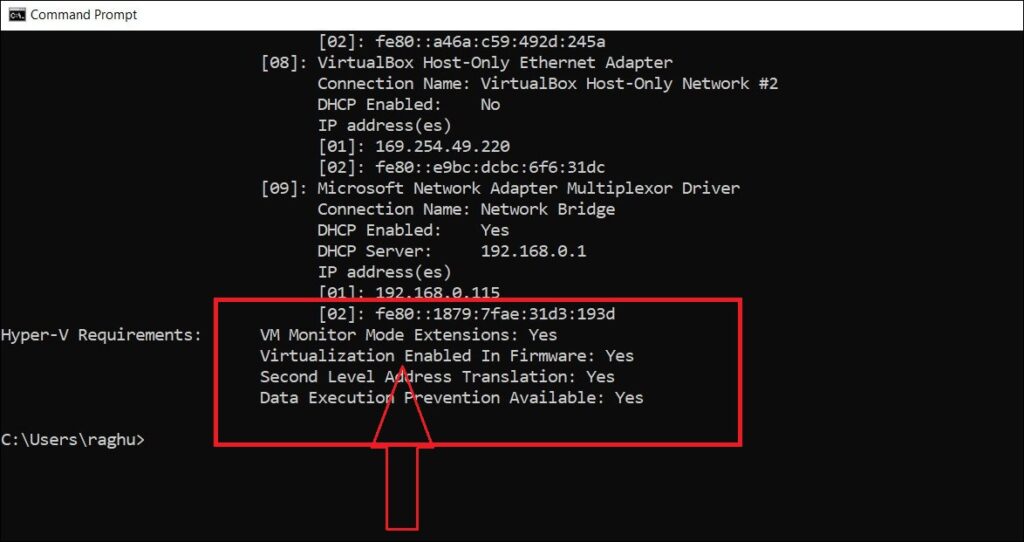
3. Here we will get the information of Hyper-V Requirements
In this case you can see that Virtualization is Enabled. But in your case it might be disabled

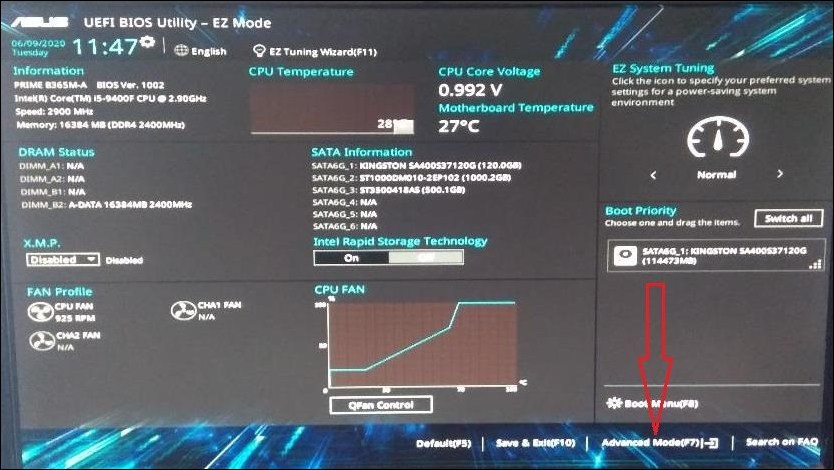
4 . To Enable Virtualization you need to restart your computer and enter into the BIOS setup.
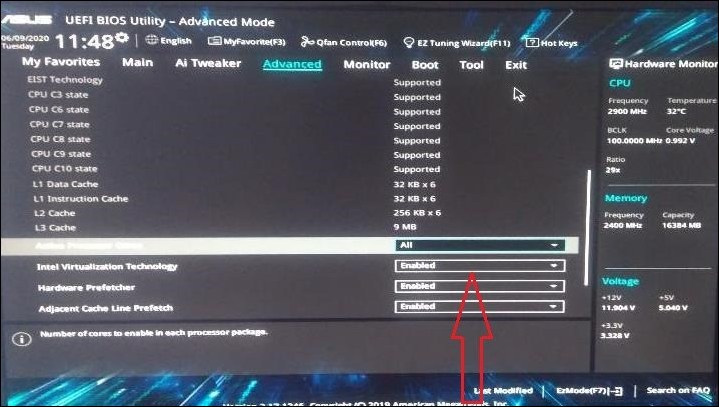
5 . System to System the BIOS configuration varies – We need to check the option for Virtualization Technology and enabled it.
Here in this case we have Asus mother board. Press F2 or Delete button to get into BIOS.


6. Change the option Disabled to Enabled and Save the changes.
Restart your machine.
Important : Here are some manufacturer details to get into BIOS setup while machine start up.
- Dell – Press F2 or Del or F12.
- HP – Press F10 or F2 or F11 or Esc.
- Lenovo – Press F1 or F2.
- Asus – Press F2 or F10 or Del.
- Acer – Press F2 or Del or F1.
- Sony – Press F2 or F3 or F1.
- Toshiba – Press F2 or F1 or Esc.
Hope this information was helpful to you.
Feel free to comment if you face any issues or have any doubts.